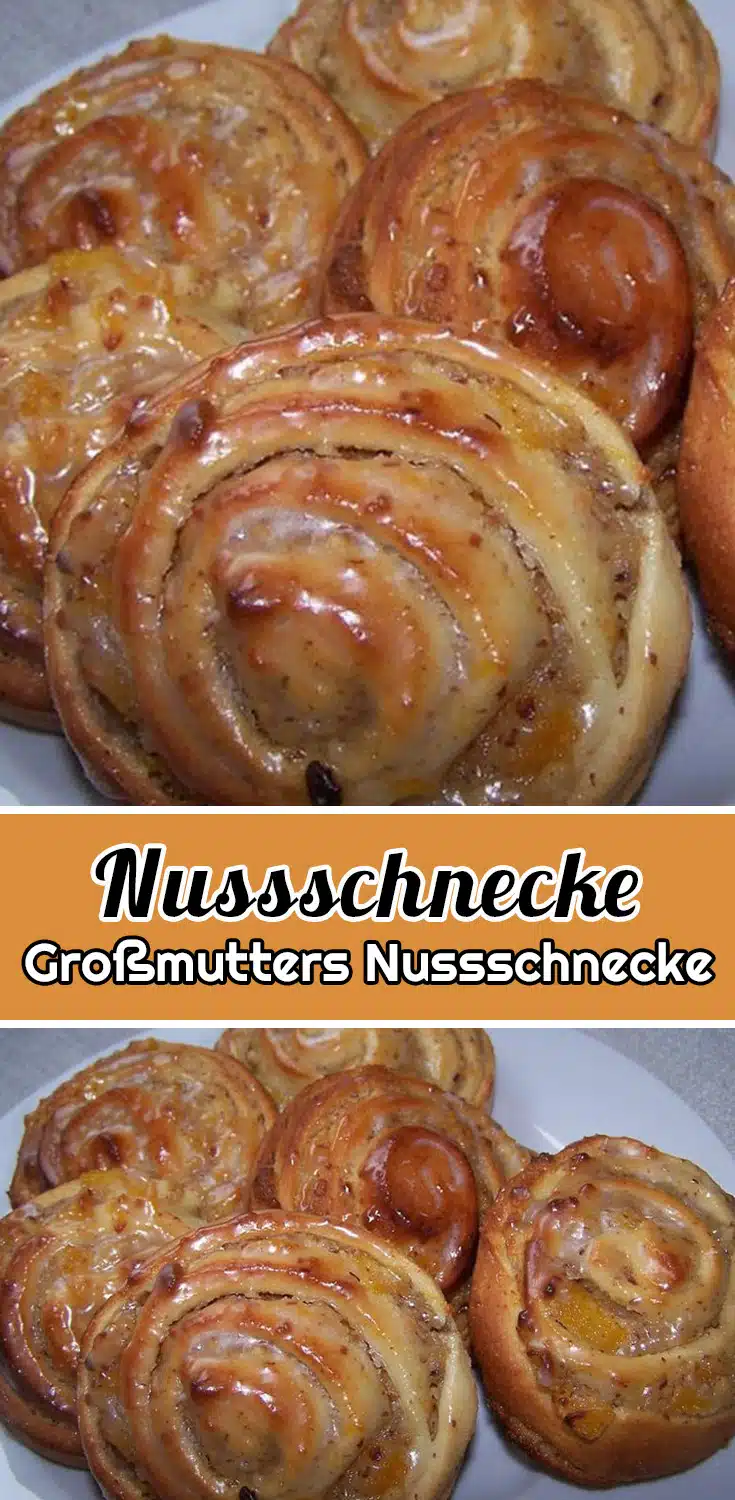
Grossmutters Nussschnecke Rezept
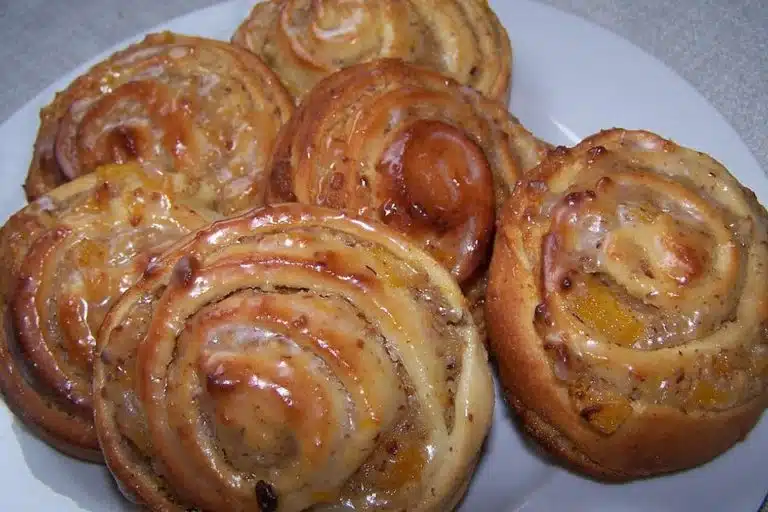
Mein liebstes Nussschnecke Rezept: Omas Klassiker trifft moderne Küche
Suchst du ein Nussschnecke Rezept, das wirklich gelingt – so wie früher bei Oma? Ich kenne das Gefühl nur zu gut. Stundenlang habe ich im Internet nach dem perfekten Rezept gesucht, das nicht zu trocken wird, schön locker und saftig bleibt und trotzdem diesen typischen, nussigen Geschmack hat, der mich an meine Kindheit erinnert. Und ganz ehrlich: Ich habe einige Fehlversuche hinter mir. Aber mittlerweile gelingt mir diese Nussschnecke mit Germteig fast blind – und ich verrate dir, worauf es ankommt!
Viele, die nach „nussschnecke rezept“ suchen, wollen ein einfaches, gelingsicheres Rezept – eins, das nicht zu kompliziert ist, aber trotzdem wie bei Grossmutter schmeckt. Vielleicht bist du auch schon an zu trockenen Schnecken verzweifelt? Oder der Teig war zu fest, die Füllung zu wenig aromatisch? Ich zeige dir, wie du das vermeidest!
Warum ich diese Nussschnecken liebe – und was bei mir früher immer schiefging
Ich erinnere mich noch gut: Bei meinen ersten Versuchen wurde der Teig einfach nicht locker. Ich war zu ungeduldig, hab nicht lange genug geknetet und die Hefe war manchmal zu alt. Noch schlimmer – die Füllung war oft zu trocken oder hat sich beim Aufrollen verabschiedet (wer kennt’s?). Erst als ich gelernt habe, dem Germteig Zeit zu geben und die Füllung wirklich bis zum Rand zu streichen, wurde es was mit dem perfekten Schnecken-Geschmack. Heute ist dieses Rezept mein „einfaches nussschnecken rezept“ für jeden Anlass.
Besonders die Mischung aus lockerem Teig und der saftigen Füllung aus Haselnüssen, Zimt und Zitronenschale ist für mich pure Nostalgie. Und das Beste: Mit ein bisschen Übung gelingt die Nussschnecke auch, wenn mal Besuch spontan vor der Tür steht. (Und seien wir ehrlich – wer kann bei dem Duft schon widerstehen?)
Kleine Fehler, große Wirkung: Was beim Nussschnecken selber machen wirklich zählt
Du willst Nussschnecken selber machen, die nicht nur gut aussehen, sondern auch schmecken wie vom Bäcker? Dann gibt es ein paar Tricks, die ich dir aus eigener Erfahrung ans Herz lege:
- Teig wirklich lange genug kneten (mindestens 10 Minuten!) – das macht ihn elastisch und locker.
- Hefe immer frisch verwenden, sonst geht der Teig nicht richtig auf.
- Die Füllung nicht zu dick und nicht zu dünn – schön bis zum Rand verstreichen.
- Schnecken mit Abstand aufs Blech setzen, damit sie beim Backen nicht zusammenkleben.
- Glasur erst auftragen, wenn die Schnecken abgekühlt sind – sonst wird sie matt und nicht glänzend.
Und noch ein Tipp aus der Praxis: Wenn du magst, kannst du die Nussschnecken vor dem Backen mit etwas Milch bestreichen, dadurch werden sie noch goldiger. Aber das Ei sorgt schon für genug Glanz.
Das klassische Grossmutters Nussschnecke Rezept – Schritt für Schritt
Hier findest du mein bewährtes Grossmutters Nussschnecke Rezept mit original Zutatenliste und genauer Anleitung. Ich halte mich dabei immer an die Mengen – sie sind perfekt abgestimmt, damit der Geschmack und die Konsistenz stimmen. (Vertraue mir: Ich hab schon mal improvisiert – das Ergebnis war… na ja, sagen wir, nicht ganz so lecker!)
Zutaten:
- 60 g Butter
- 1 egg (for brushing)
- 2 egg yolks
- 42 g fresh yeast (1 cube)
- 250 g all-purpose flour
- 250 g fine semolina flour
- 200 ml lukewarm milk
- 1 pinch of salt
- 50 g granulated sugar
- 250 g hazelnuts
- 1 tbsp rum
- 1 tbsp ground cinnamon
- 3 tbsp powdered sugar
- 1 tbsp grated organic lemon zest
- 2 tbsp jam
- 100 g powdered sugar
- 1 egg white
- A splash of lemon juice
Zubereitung:
- Crumble the fresh yeast into a mixing bowl. Add a pinch of sugar and 5 tablespoons of lukewarm milk. Stir to combine and create a smooth starter dough (Vorteig). Let this mixture rest for about 20 minutes in a warm place until it becomes bubbly and slightly thickened, indicating that the yeast is active.
- In a large bowl, combine the all-purpose flour, fine semolina flour, and salt. Add the prepared yeast starter, remaining lukewarm milk, melted butter, granulated sugar, and egg yolks. Mix all ingredients together and knead by hand or with a dough hook for about 10 minutes, until a smooth, supple dough forms. The dough should be elastic and pull away from the sides of the bowl.
- Continue kneading the dough energetically (‚abschlagen‘) until it develops bubbles and is very smooth. This step helps the dough become airy and light.
- Cover the dough with a clean kitchen towel and let it rise in a warm, draft-free place for about 30 minutes, or until it has doubled in size.
- Once the dough has risen, divide it into two equal portions. On a lightly floured surface, roll each portion into a rectangle of about 1 cm thickness. Ensure both rectangles are roughly the same size for even baking.
- For the filling, finely chop or grind the hazelnuts. In a bowl, mix the hazelnuts with ground cinnamon, grated lemon zest, powdered sugar, and rum. Stir until everything is evenly combined and the mixture is fragrant.
- Evenly spread the nut filling over each rolled-out dough rectangle, ensuring the mixture reaches the edges for even flavor in each slice.
- Starting from the long side, carefully roll up each dough rectangle into a tight log. Use gentle pressure to ensure the roll stays even but do not press so hard that the filling spills out.
- Using a sharp knife, cut each roll into slices about 1.5 cm thick. Wipe the knife between cuts if necessary to keep the slices neat.
- Place the slices, cut side up, onto a baking sheet lined with parchment paper. Leave a little space between each piece to allow for expansion. Let the cut rolls rest for another 5 minutes to rise slightly.
- In a small bowl, whisk the whole egg until well combined. Gently brush the tops and sides of each roll with the beaten egg to give them a shiny, golden finish after baking.
- Preheat your oven to 180°C (356°F) with top and bottom heat. Place the baking sheet in the middle rack and bake for about 15 minutes, or until the rolls are golden brown and cooked through. The kitchen should smell wonderfully of nuts and cinnamon.
- Remove the Nussschnecken from the oven and let them cool on a wire rack until completely cooled before garnishing.
- For the glaze, sift the powdered sugar into a bowl to remove any lumps. Add the egg white and a splash of lemon juice. Whisk together until you have a thick, smooth, and glossy icing. If it’s too thick, add a tiny bit more lemon juice; if too thin, add more powdered sugar.
- Warm the jam slightly until it’s spreadable. Using a pastry brush, lightly brush the tops of the cooled Nussschnecken with the jam to give them a subtle fruit glaze.
- Drizzle or spread the prepared icing over the jam-coated rolls. Allow the glaze to set and dry completely before serving. Arrange the Nussschnecken on a platter and enjoy with a cup of coffee or tea.
Lieblings-Tipps für extra saftige Nussschnecken
Ich hab über die Jahre gemerkt: Kleine Kniffe machen den Unterschied. Für besonders saftige Nussschnecken mit Germteig (wirklich wie bei Grossmutter!) solltest du auf die Ruhezeiten achten. Der Teig mag es warm und zugluftfrei – ein ausgeschalteter Backofen mit eingeschaltetem Licht ist perfekt. Die Füllung kannst du nach Geschmack mit etwas mehr Zimt oder Zitrone anpassen, aber nie die Mengen der Hauptzutaten – sonst stimmt das Verhältnis nicht mehr.
Und falls du dich fragst: Geht das Rezept auch vegan? Ich hab’s ausprobiert – klappt, aber das Original schmeckt mir einfach am besten. Vielleicht bist du da ja anderer Meinung?
Fazit: Mein einfaches Nussschnecken Rezept für jeden Tag
Es gibt viele Wege, Nussschnecken selber zu machen, aber dieses Rezept bleibt für mich unschlagbar. Jedes Mal, wenn ich sie backe, denke ich an die Nachmittage bei meiner Oma zurück, wenn der Duft durch das ganze Haus zog. Probier es aus – du wirst sehen: Dieses Grossmutters Nussschnecke Rezept bringt nicht nur Kindheitserinnerungen zurück, sondern schmeckt auch Gästen und Familie immer wieder. Wer weiß, vielleicht wird es auch dein Lieblingsrezept?
Viel Freude beim Nachbacken und guten Appetit!
Tipps & Tricks rund ums Backen: Omas Nussschnecken gelingen immer!
Warum wird mein Hefeteig für die Nussschnecken nicht locker und fluffig?
Oft liegt es an der Temperatur der Zutaten oder daran, dass der Teig nicht lange genug geknetet oder gehen gelassen wurde. Ich lasse meinen Hefeteig immer an einem richtig warmen Ort ruhen (im ausgeschalteten Backofen mit eingeschaltetem Licht klappt das super!). Wenn der Teig zu kalt ist, geht er kaum auf – also lieber etwas Geduld haben.
Kann ich die Haselnüsse durch andere Nüsse oder Füllungen ersetzen?
Na klar! Walnüsse, Mandeln oder Pekannüsse funktionieren genauso gut. Für eine exotischere Variante kann man auch Pistazien nehmen. Oder du probierst es mal mit einer Mischung aus Nüssen und Trockenfrüchten – das schmeckt auch richtig lecker.
Wie bewahre ich Omas Nussschnecken am besten auf und kann ich sie einfrieren?
Am besten lagerst du die Nussschnecken in einer gut schließenden Dose bei Zimmertemperatur – dann bleiben sie 2-3 Tage frisch. Zum Einfrieren einfach ohne Guss einfrieren und bei Bedarf kurz aufbacken, dann schmecken sie fast wie frisch gebacken. Die Glasur kannst du dann nach dem Auftauen auftragen.
Kann ich die Nussschnecken schon am Vortag vorbereiten?
Ja, das mache ich tatsächlich oft, wenn Gäste kommen! Du kannst die Schnecken abends fertig formen, auf das Blech setzen und abgedeckt über Nacht im Kühlschrank gehen lassen. Am nächsten Morgen nur noch backen, glasieren – und genießen. Das spart morgens richtig Zeit.
Gibt es Tipps für eine Nussschnecke wie vom Bäcker?
Für das typische Bäcker-Feeling musst du auf einen schön elastischen Hefeteig achten (ruhig lange kneten!). Und der Trick ist: Die Schnecken mit heißer Aprikosenmarmelade bestreichen, bevor der Zuckerguss draufkommt. So glänzen sie herrlich und schmecken wie frisch aus der Backstube.
Grossmutters Nussschnecke Rezept
- Total Time: 30
- Yield: 6 Portionen 1x
Description
Diese Nussschnecken werden aus einem Germteig zubereitet. Das Rezept ist ein kleiner Snack oder als Kaffeejause gedacht. klassische alte Rezepte
Ingredients
- 60 g Butter
- 1 egg (for brushing)
- 2 egg yolks
- 42 g fresh yeast (1 cube)
- 250 g all-purpose flour
- 250 g coarse flour (or bread flour)
- 200 ml lukewarm milk
- 1 pinch salt
- 50 g granulated sugar
- 250 g hazelnuts
- 1 tablespoon rum
- 1 tablespoon ground cinnamon
- 3 tablespoons powdered sugar
- 1 tablespoon grated lemon zest (organic)
- 2 tablespoons jam (apricot or similar)
- 100 g powdered sugar
- 1 egg white
- a splash of lemon juice
Instructions
- Begin by preparing the yeast starter (Dampfl): Crumble the fresh yeast into a mixing bowl. Add a pinch of granulated sugar and 5 tablespoons of the lukewarm milk. Stir together until the yeast dissolves and forms a smooth mixture. Cover the bowl and let it rest in a warm place for about 20 minutes, or until the mixture becomes bubbly and slightly thickened.
- While the starter is resting, combine the all-purpose flour and coarse flour in a large mixing bowl. Add the remaining lukewarm milk, melted butter, the egg yolks, remaining granulated sugar, and a pinch of salt. Once the yeast starter is ready, pour it into the flour mixture.
- Using a stand mixer with a dough hook or your hands, knead the mixture until it forms a smooth, elastic dough. Continue kneading and ’slapping‘ the dough against the sides of the bowl until it is glossy and bubbles begin to form, which indicates good gluten development. This may take 8-10 minutes.
- Cover the bowl with a clean kitchen towel and let the dough rise in a warm, draft-free spot for about 30 minutes, or until it has doubled in size.
- Once the dough has risen, turn it out onto a lightly floured surface. Divide it in half and roll each portion into a rectangle, each approximately 1 cm thick. This will help you shape the classic snail rolls later.
- Prepare the filling: Finely chop or grind the hazelnuts. In a bowl, mix together the ground hazelnuts, ground cinnamon, grated lemon zest, powdered sugar, and rum until well combined. The mixture should be fragrant and slightly moist.
- Evenly sprinkle the nut filling over each rectangle of rolled-out dough, covering the entire surface. Gently press the filling into the dough using your hands or a rolling pin, so it adheres.
- Starting from the longer edge, tightly roll up each rectangle into a log, enclosing the filling. Using a sharp knife, slice the logs into pieces about 1.5 cm thick to form the classic snail-shaped rolls.
- Place the cut rolls, cut side up, onto a baking sheet lined with parchment paper, leaving space between each roll for expansion. Cover with a towel and let them rest for an additional 5 minutes to rise slightly.
- Preheat your oven to 180°C (356°F) with both upper and lower heat.
- In a small bowl, whisk the whole egg until well mixed. Using a pastry brush, gently brush the surface of each roll with the beaten egg. This will give them a beautiful golden shine when baked.
- Transfer the baking sheet to the preheated oven and bake the rolls for about 15 minutes, or until they are golden brown and cooked through. Watch them closely to prevent over-baking.
- Once baked, remove the rolls from the oven and let them cool completely on a wire rack before garnishing.
- For the glaze, sift the powdered sugar into a bowl. Add the egg white and beat together until you have a thick, smooth icing. Add a splash of lemon juice and mix well. The glaze should be thick but pourable.
- Gently warm the jam until it is liquid (you can do this in the microwave or a small saucepan). Using a pastry brush, lightly brush each cooled Nussschnecke with the warm jam to give a glossy finish and help the glaze adhere.
- Drizzle or pipe the lemon icing over the glazed rolls in thin lines or patterns as desired. Allow the icing to set and harden at room temperature.
- Once the glaze is dry, your Grossmutters Nussschnecken are ready to serve. Enjoy them fresh with coffee or as a sweet snack.
Notes
For the best flavor, use freshly ground hazelnuts and organic lemons for the zest. You can substitute walnuts for hazelnuts if desired. The jam helps the glaze stick and adds an extra layer of flavor, but you can skip it if you prefer. Allowing the dough to rise in a warm, draft-free area ensures a light and fluffy texture. These Nussschnecken are best enjoyed fresh but can be stored in an airtight container for 1-2 days.
- Prep Time: 10
- Cook Time: 20
- Category: Dessert Rezepte
Nutrition
- Serving Size: 6 Portionen
- Calories: 350-450
- Sugar: 11-16g
- Sodium: 500-800mg
- Fat: 17-25g
- Saturated Fat: 7-11g
- Carbohydrates: 40-50g
- Fiber: 2-5g
- Protein: 15-25g
- Cholesterol: 60-100mg